
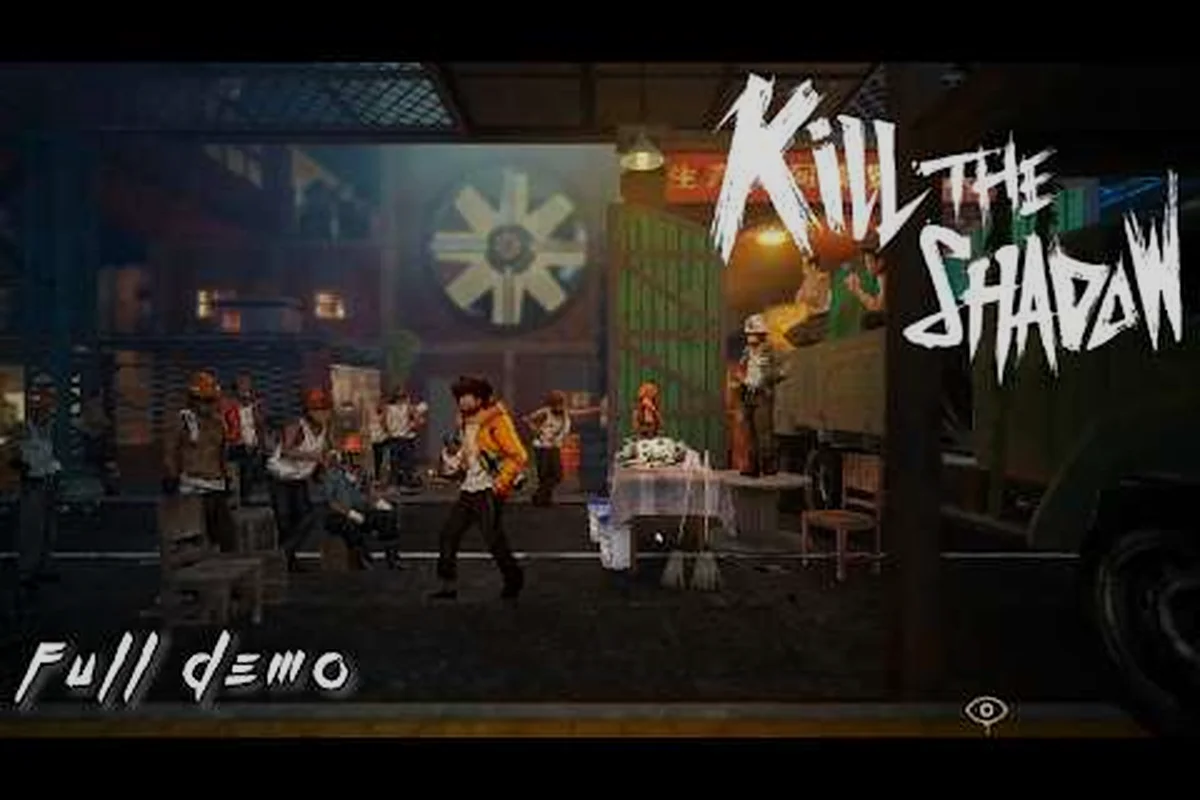
Stepping into the rain-slicked streets of a pixel-noir city for the first time can feel disorienting because the game throws you directly into a crime scene with only a battered notebook and a mysterious entity called the Shadow. The opening tutorial teaches you how to scan a room, pick up physical evidence, and question witnesses, but it does not explain the deeper logic that ties those actions together in a full Kill The Shadow investigation guide. Understanding the loop is what separates a fumbling amateur from a detective who cracks every case before the final act, and players who treat every clue as a potential witness statement unlock dialogue branches that other runners never see. If you are picking up the controller for the first time, the beginner primer covers movement and menu basics, while this guide focuses specifically on the deduction layer that defines a complete Kill The Shadow walkthrough.
Investigation Basics — What Every Detective Needs to Know
The investigation loop in this 2.5D detective RPG runs through five repeating phases: observe, collect, deduce, question, and rewind. Observation reveals hidden hotspots that glow faintly when you walk close enough, because pixel-noir lighting deliberately obscures detail in shadow. Collecting means interacting with those hotspots to add evidence cards to your inventory, while deducing happens when you step away from the scene and visit the corkboard screen to start linking cards together. Questioning returns you to the streets to interview suspects with the new context you have gathered, and rewind lets the Shadow reverse a brief window of time so you can witness events that your current playthrough missed entirely. Each phase feeds the next, and skipping any of them almost always leads to a dead-end deduction on the corkboard that wastes an entire evening of progress.
Core Investigation Loop
A common mistake new players make is rushing the question phase because dialogue feels more dramatic than walking around a quiet room, but experienced detectives deliberately postpone every interview until they have at least three clues on the corkboard. That pacing matters because witnesses in this game respond differently based on what you already know, so a question asked with no context tends to trigger the defensive barked answer variant. Holding off until you have evidence unlocks the gentler reflective variant, which often includes an extra sentence of testimony that the witness would not have given otherwise. If you want a deeper breakdown of the question phase specifically, the clue gathering breakdown expands on how physical evidence reshapes witness answers.
Tools of the Trade
Every detective in the city operates with a fixed kit that grows stronger as the campaign unfolds, and learning what each item does early helps you avoid wasting valuable scene interactions on dead-end clues. The kit is intentionally small so that every tool feels meaningful, and the developers confirmed in the GamingBolt interview that no hidden sixth tool exists.
| Tool | Primary Use | Best Moment to Use |
|---|---|---|
| Notebook | Logs every witness quote | Right after each conversation |
| Magnifier | Highlights trace evidence | During first sweep of a location |
| Camera | Locks crime-scene photos | Before rewind is triggered |
| Corkboard | Connects evidence strings | After collecting 3+ clues |
| Shadow Lens | Reveals alternate-timeline events | Mid-scene when a contradiction appears |
Mastering the Time Rewind Mechanic
The Shadow ability is the single most distinctive system in the game, and it sits at the heart of any serious Kill The Shadow walkthrough because it gives you information no other detective tool can. When you activate the Shadow at a crime scene, the environment briefly desaturates, ambient sound cuts out, and a translucent overlay shows what happened in that exact spot during the previous few seconds. Witnesses who walked away reappear in ghostly form, dropped items float back into the hands that dropped them, and dialogue snippets replay with subtitled labels showing who originally said them. None of that information is available through normal observation, which means every case effectively has two layers: the layer you witness firsthand, and the hidden layer only the Shadow can reveal.
When to Activate Shadow Vision
Activating the ability at the wrong moment wastes its cooldown, and because each case limits how many times you can rewind per scene, you must learn the rhythm that experienced players use. The optimal trigger is right after you collect your third or fourth clue but before you commit to a deduction on the corkboard, because that window gives you enough context to know what contradiction to look for. If you rewind too early, you will see fragments with no framework to interpret them, and you may even misread a translucent figure as a suspect when it is actually a background witness who only walked through the room. If you rewind too late, you have already locked a deduction that the rewind evidence contradicts, forcing you to tear down your corkboard and lose progress.
Timeline Reconstruction Steps
Reconstructing a timeline feels like assembling a jigsaw when half the pieces are missing, because the Shadow does not show you a continuous replay but rather snapshots of key moments. Players who follow a methodical Kill The Shadow walkthrough treat each rewind as a five-step task: identify the visible window, scan for movement, listen for audio cues, mark the witness position, and finally cross-reference what you saw with the clue cards already on your corkboard. Doing those steps in order prevents the common mistake of seeing a fragment and assuming it answers your case, because fragments rarely mean anything until you compare them against the larger evidence trail.
| Rewind Step | What You Should Look For | Common Mistake |
|---|---|---|
| Scan window | Character outlines | Stopping at first detail |
| Audio check | Gunshot, footsteps, glass | Ignoring background hum |
| Witness position | Body language, gaze direction | Reading facial features |
| Object traces | Hands, pockets, dropped items | Missing pickup order |
| Cross-reference | Match against corkboard | Trusting rewind alone |
Corkboard Deduction System Deep Dive
The corkboard is where your collected clues transform into a case file, and learning to read it efficiently is what separates a useful Kill The Shadow investigation guide from a generic tips article. Every piece of evidence you pick up becomes a card pinned to the board with a string of red yarn attached, and you are free to connect any two cards by dragging yarn between them. Connected cards form threads, and threads that share a common theme can be grouped into larger cases that unlock new dialogue branches, additional locations, and occasionally an entirely new act that other runners never reach. The board grows visually dense as the campaign progresses, which is why players returning for a second run often run straight to the corkboard first to see how their new clue set compares to the one they built last time.
Connecting Evidence Threads
A thread is only valid when the two cards share a logical relationship the game can verify, which means you cannot just link every card to every other card hoping something sticks. The system checks for three possible link types: motive, opportunity, and means, and each card has hidden tags indicating which of these it can satisfy. A bloody glove and a missing knife can be linked by means, a threatening letter and a victim's diary entry can be linked by motive, while a witness seen at the door and a security camera timestamp can be linked by opportunity. The system also recognizes mixed links, so a single thread can carry motive and means if both cards carry both tags, which is what creates the satisfying aha moments that make the corkboard feel like an actual detective's workspace rather than a simple matching puzzle.
Avoiding Deduction Traps
Many first-time players fall into deduction traps because the corkboard rewards connections that feel emotionally satisfying but are mechanically wrong. Linking a victim's wedding ring to a suspect's wedding photo because they "look related" does nothing, and the game even flashes a brief tooltip warning you that the connection has no evidentiary basis. Experienced detectives on a thorough Kill The Shadow walkthrough instead pause after every link, hover the mouse over each card, and read the small tag icons before committing. If the tags do not match across motive, opportunity, and means, the link contributes nothing to your case progress and may even cost you a rewind charge later because the system treats a locked thread as a confirmed lead.
| Evidence Type | Link Category | Risk of False Connection | Verification Cue |
|---|---|---|---|
| Physical object | Means | Low | Forensic tag |
| Document | Motive | Medium | Date alignment |
| Testimony | Opportunity | High | Witness bias flag |
| Photo | Means / Opportunity | Medium | Timestamp check |
| Audio clip | Motive / Means | High | Source distance |
Branching Paths and Narrative Strategy
The branching structure is what makes replays worth running because each choice you make on the corkboard changes which ending you unlock, and a Kill The Shadow investigation guide that ignores that system leaves you solving only the surface cases. There are three main ability paths that open around chapter three: Spirit Path, Pulse Path, and Echo Path, and the path you commit to changes how witnesses react to your questions, which locations become accessible, and which final confrontation you trigger. Players chasing the rare Balance Ending typically plan their first run as a Spirit run and their second as a Pulse run, then attempt Echo on the third run to position themselves in the middle for the rarest conclusion.
Choosing Investigation Routes
When the game offers you a fork in the road during chapter three, the choice feels weighty because each path trades one type of information for another. The Spirit Path gives you better emotional reads on witnesses, which means more reliable testimony during the question phase but fewer physical clues at crime scenes because the path dampens your sensitivity to physical hotspots. The Pulse Path reverses that balance, granting enhanced physical detection at the cost of muddied witness statements, because heightened sensory input makes it harder to read subtle facial cues. The Echo Path sits between them, granting modest bonuses to both but never excelling at either, which is why it is the hardest path to play well despite sounding like the easiest on paper. If you want a focused build guide for the Spirit variant specifically, the Spirit build write-up walks through the optimal corkboard layout for that route.
Reputation and Witness Trust
Witness trust is a hidden stat that drifts up or down depending on how you treat people during questioning, and reputation directly affects which dialogue options appear in the final confrontation. Witnesses remember if you pressured them, bribed them, or showed genuine empathy, and that memory persists across the entire game rather than resetting between chapters. Players on a careful Kill The Shadow walkthrough treat every interview as a long-term investment, because the same witness who shuts down in chapter two might hand you a critical clue in chapter six if you handled them gently early on. Conversely, a witness you cornered with evidence in chapter three will often refuse to meet you in chapter five entirely, which closes off at least one major case branch. If you want a complete walkthrough of one full investigation including the witness trust arc, the case walkthrough reference walks through a full Spirit Path run from opening scene to final confrontation.
| Ability Path | Question Bonus | Crime Scene Bonus | Final Ending Type |
|---|---|---|---|
| Spirit Path | High emotional reads | Standard physical access | Whisper Ending |
| Pulse Path | Standard emotional reads | High physical access | Signal Ending |
| Echo Path | Moderate across both | Moderate across both | Balance Ending |
Investigation FAQ
What is the best starting move for a new Kill The Shadow investigation guide run?
Begin every case with a slow first sweep of the crime scene using the magnifier before talking to any witness, because physical evidence collected early frames the questions you ask later. Many experienced detectives recommend treating the notebook as a real detective would, jotting down everything verbatim so you can spot contradictions during the rewind phase.
How many times can I use the time rewind ability per scene?
The base limit is three rewind activations per crime scene, although certain evidence combinations on the corkboard can grant a fourth or even fifth activation if you link enough opportunity-based threads together. If you are running low on rewind charges, back away from the scene and revisit it later in the chapter when more clues have been collected and a second rewind becomes available.
Does the choice of ability path lock me out of other endings?
No path fully locks out another ending, but reaching the rare Balance Ending requires building moderate trust with both Spirit-aligned and Pulse-aligned witnesses across the entire campaign. If you commit fully to one path, you will see that path's signature ending but miss the Balance Ending entirely, so players chasing completion often run the campaign at least twice with different early choices.
Where can I find the official game page for reference?
The official Kill The Shadow Steam store page lists every mechanic discussed here and confirms the corkboard and rewind systems are central to the experience. The developer interview published by GamingBolt expands on the three ability paths and explains the design intent behind each ending.
Which ending should I aim for first as a new player?
Most newcomers feel the Whisper Ending offers the most natural introduction because it follows the Spirit Path's emotional pacing, which mirrors how the opening chapters of the game already lean toward character moments. The Signal Ending rewards players who already feel comfortable with the corkboard mechanics, while the Balance Ending is intentionally placed as a third-run reward because it requires juggling two witness-trust economies at once.
Drop a comment below with which ability path you are committing to first, and share the strangest clue combination that actually cracked a case for you.