
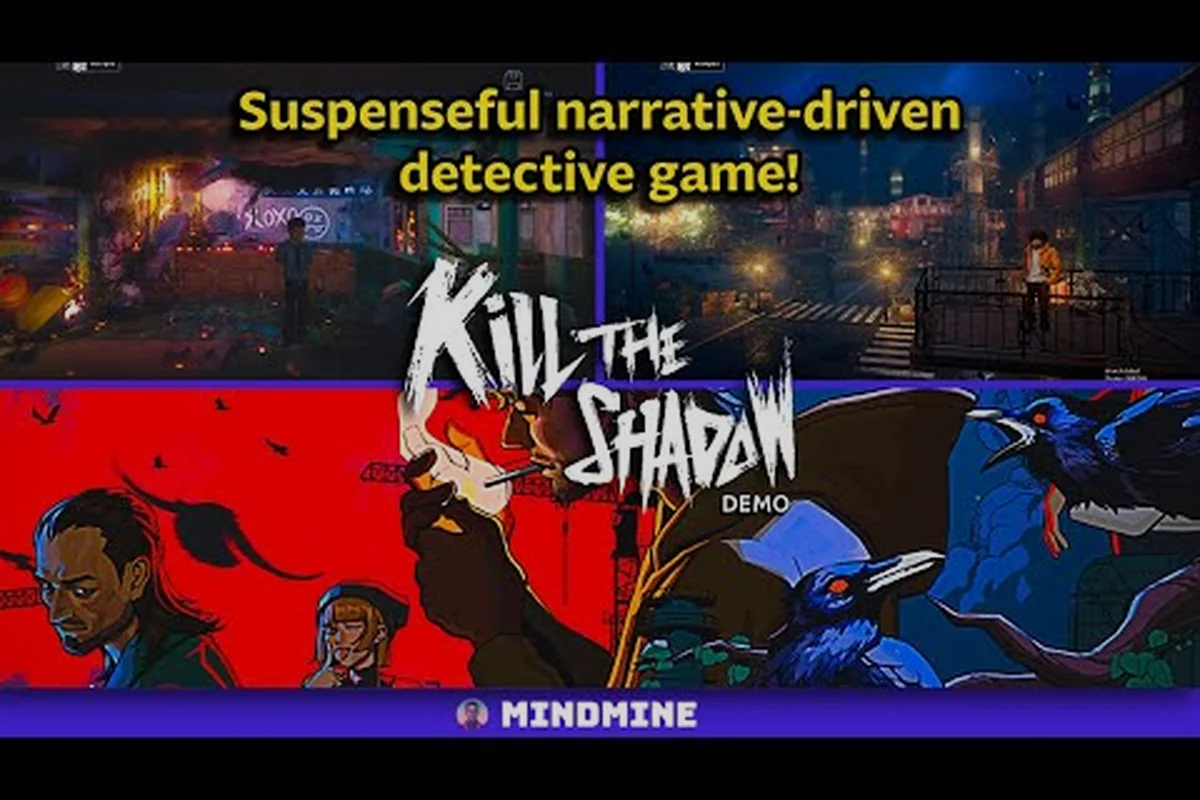
Every detective needs to know where to spend their time, and in Kill The Shadow, your choice of district in Dark Tide City determines the cases you crack, the NPCs you meet, and the resources that flow into your investigation. As Lucas, the brooding protagonist tethered to the parasitic entity known as The Shadow, you will wander through a post-war divided city packed with environmental storytelling, corkboard-worthy conspiracies, and time-rewind-driven puzzles. Because each neighborhood offers a wildly different experience, we have built this comprehensive Kill The Shadow district tier list ranking to help you prioritize the streets that matter most.
探偵にとって、どこで時間を費やすかを知るのは不可欠です。Kill The Shadowでは、ダークタイドシティ内の地区選びが、解決する事件、出会うNPC、そして捜査に流れ込む資源を決定します。The Shadowという寄生体に繋がれた陰気な主人公Lucasとして、あなたは環境ストーリーテリング、コルクボードにふさわしい陰謀、そしてタイムリワインド駆動のパズルに満ちた、戦後分割された都市をさすらうことになります。各地区はまったく異なる体験を提供するため、最重要通りを優先するためのこの包括的なKill The Shadow ディストリクトティアリストランキングを構築しました。
Whether you are hunting down leads for Captain Wang, schmoozing with informants such as Kiki and Teddy, or piecing together strings on your trusty corkboard, the district you walk into will shape the rhythm of your playthrough. Below, we will break down every major area of Dark Tide City into S, A, B, and C tiers, explain the scoring criteria, and answer the most common questions players raise while exploring this remarkable 2.5D pixel-noir detective RPG.
Captain Wangの线索を追っているときも、KikiやTeddyのような情報提供者との商談も、信頼のコルクボードで线索をまとめるときも、足を踏み入れる地区がプレイのテンポを形作ります。以下では、ダークタイドシティの各主要エリアをS、A、B、Cティアに分類し、採点基準を説明し、この素晴らしい2.5Dピクセルノワール探偵RPGを探検する際にプレイヤーから寄せられる最も一般的な質問に答えます。
Why District Choice Matters in Kill The Shadow
Dark Tide City is not an open sandbox; it is a tightly woven web of neighborhoods, each stitched to a different chapter of Lucas's journey. While the global map allows free travel after Act I, the developer Shadowlight has carefully tuned loot tables, NPC density, side-case availability, and time-rewind puzzle complexity per zone. Choosing to spend your first hours in a low-yield district can starve your Strength, Spirit, or Charm build of the upgrade materials it desperately needs.
ダークタイドシティは開けたサンドボックスではなく、Lucasの旅の異なる章に縫い付けられた地区の緊密に織られたウェブです。グローバルマップでは Act I 後に自由な移動が可能ですが、開発元Shadowlightは各ゾーンのルートテーブル、NPC密度、サブケースの可用性、タイムリワインドパズルの複雑さを慎重に調整しています。最初の数時間を低収益地区で過ごすと、Strength、Spirit、Charmビルドのアップグレード素材を枯渇させる可能性があります。
How We Ranked Each District
To keep our Kill The Shadow district tier list ranking transparent, we scored each area across five dimensions:
Kill The Shadow ディストリクトティアリストランキングの透明性を保つため、各エリアを5つの次元で採点しました。
-
Case Density – How many main and side investigations originate here.
-
NPC Richness – Quality and quantity of dialogue, romance hooks, and lore drops.
-
Loot Value – Crafting components, weapon mods, and Spirit shards.
-
Environmental Storytelling – Pixel-noir vignettes, hidden notes, and time-rewind anchors.
-
Build Synergy – How well the district supports Strength, Spirit, or Charm playstyles.
-
事件密度 – ここで発生するメインおよびサイド捜査の数。
-
NPCの充実度 – 会話、ロマンスフック、 lore ドロップの質と量。
-
ルート価値 – クラフト素材、武器MOD、スピリットシャード。
-
環境ストーリーテリング – ピクセルノワールのヴィネット、隠しメモ、タイムリワインドアンカー。
-
ビルドシナジー – 地区がStrength、Spirit、Charmのプレイスタイルをどれだけサポートするか。
Build Influence on District Value
A Strength build focused on brawling through alleyways will value the Factory District far more than a Charm detective who relies on smooth-talking witnesses. Conversely, Spirit specialists chasing The Shadow's deepest visions will want to linger in places soaked with supernatural residue. Keep your dominant stat in mind as you read the tier placements below.
路地で暴れ回ることに焦点を当てたStrengthビルドは、滑らかな話術で証人に頼るCharm探偵よりもファクトリー地区を高く評価するでしょう。逆に、The Shadowの最深部のヴィジョンを追うSpirit特化型は、超自然的な残滓に浸かった場所に留まりたがるでしょう。以下のティア配置を読む際は、主要ステータスを念頭に置いてください。
S-Tier Districts: The Must-Visit Zones
These areas deliver the strongest combination of cases, NPCs, and rewards. If you are playing Kill The Shadow for the first time, you should treat S-Tier districts as your home base until every corkboard thread is exhausted.
これらのエリアは、事件、NPC、報酬の最強の組み合わせを提供します。初めてKill The Shadowをプレイする場合、すべてのコルクボードの线索が尽きるまで、Sティア地区をホームベースとして扱うべきです。
1. Pig Cage Walled City — The Crown Jewel
The neon-lit Pig Cage Walled City is the beating heart of the Kill The Shadow district tier list ranking, and it is the only place where all five scoring dimensions consistently hit maximum marks. A vertical slum of stacked shipping containers and flickering kanji signs, Pig Cage is where Lucas first meets Kiki, the underground information broker who feeds him half-truths for Spirit shards. It also houses:
ネオンに照らされたピッグケージウォールドシティは、Kill The Shadow ディストリクトティアリストランキングの鼓動する中心であり、5つの採点次元すべてが一貫して最高評価を獲得する唯一の場所です。積み上げられた輸送用コンテナとちらつく漢字看板が立ち並ぶ垂直スラムであるピッグケージは、Lucasがスピリットシャードと引き換えに半真実を提供する地下情報ブローカーKikiと初めて出会う場所です。また、次の要素も含まれています:
-
The Shadow's first major vision sequence, unlocking the time-rewind tutorial.
-
Three branching side cases that pivot on Charm or Spirit checks.
-
The densest population of hidden dialogue triggers in the game.
-
Shadowの最初のメジャーヴィジョンシーケンスで、タイムリワインドチュートリアルをアンロックする。
-
CharmまたはSpirit判定を中心に展開する3つの分岐サイドケース。
-
ゲーム内で最も密度の高い隠し会話トリガー群。
| District Stat | Pig Cage Walled City Rating |
|---|---|
| Case Density | ★★★★★ |
| NPC Richness | ★★★★★ |
| Loot Value | ★★★★☆ |
| Environmental Storytelling | ★★★★★ |
| Build Synergy | All-rounder |
| 地区ステータス | ピッグケージウォールドシティ評価 |
|---|---|
| 事件密度 | ★★★★★ |
| NPC充実度 | ★★★★★ |
| ルート価値 | ★★★★☆ |
| 環境ストーリーテリング | ★★★★★ |
| ビルドシナジー | 万能型 |
2. Shipwreck Wharf — The Investigation Powerhouse
Perched on creaking wooden stilts above the toxic harbor, Shipwreck Wharf is the second S-Tier destination in our Kill The Shadow district tier list ranking. This is where Captain Wang keeps his unofficial office, and the cases that originate here are tightly linked to the city's smuggling underbelly. The Wharf is famous among veteran players for its time-rewind puzzles, which often require rewinding tide movements to recover evidence submerged minutes earlier.
有毒な港の上に軋む木の支柱で立てられたシップレックワーフは、Kill The Shadow ディストリクトティアリストランキングで2番目のSティア目的地です。ここはCaptain Wangが非公式のオフィスを構える場所であり、ここで発生する事件は街の密輸裏社会と密接に結びついています。Wharfはベテランプレイヤーの間でタイムリワインドパズルで有名で、数分前に水没した証拠を回収するために潮の動きをリワインドすることがよく必要です。
If you enjoy corkboard deduction that spans multiple in-game days, this district is your playground. The combination of vertical exploration, waterlogged secrets, and high-value loot drops makes Shipwreck Wharf a mandatory stop on any optimized route through Dark Tide City.
複数のゲーム内日数にわたるコルクボード推論を楽しめば、この地区はあなたの遊び場です。垂直探索、水浸しの秘密、高価値のルートドロップの組み合わせにより、シップレックワーフはダークタイドシティの最適化されたルート上で必ず立ち寄るべき場所となっています。
A-Tier Districts: Strong Picks With Niche Excellence
A-Tier districts offer fantastic content but specialize in narrower ways. They are perfect secondary destinations after you have cleared the S-Tier zones, and they often contain the lore answers that the main quest glosses over.
Aティア地区は素晴らしいコンテンツを提供しますが、より狭い方法で特化しています。Sティアゾーンをクリアした後の完璧な第2目的地であり、メインクエストが見落とす lore の答えをよく含んでいます。
3. Factory District — The Strength Build Paradise
The Factory District ranks high in our Kill The Shadow district tier list ranking because it is the only zone where Strength builds feel truly empowered. Assembly lines still churn under the control of an automated overseer, and abandoned break rooms hide weapon schematics that push Lucas's melee damage into overdrive.
ファクトリー地区は、Strengthビルドが真に力を感じる唯一のゾーンであるため、Kill The Shadow ディストリクトティアリストランキングで高くランク付けされています。組立ラインは自動化された監視者の制御下で今も稼働しており、放置された休憩室にはLucasの近接ダメージをオーバードライブに押し上げる武器の設計図が隠されています。
| District Stat | Factory District Rating |
|---|---|
| Case Density | ★★★★☆ |
| NPC Richness | ★★★☆☆ |
| Loot Value | ★★★★★ |
| Environmental Storytelling | ★★★★☆ |
| Build Synergy | Strength primary |
| 地区ステータス | ファクトリー地区評価 |
|---|---|
| 事件密度 | ★★★★☆ |
| NPC充実度 | ★★★☆☆ |
| ルート価値 | ★★★★★ |
| 環境ストーリーテリング | ★★★★☆ |
| ビルドシナジー | Strength重視 |
What the Factory District lacks in romance options, it more than makes up for in raw firepower rewards. Players chasing the "Iron Fist" achievement will spend dozens of hours here, rewinding conveyor belts to unlock hidden caches.
ファクトリー地区がロマンスオプションで欠けている部分は、生の火力報酬で十分補っています。「アイアンフィスト」実績を追うプレイヤーは、隠しキャッシュをアンロックするためにコンベアベルトをリワインドしながら、ここで何十時間も費やすことになります。
4. Old Town — The Charm Capital
The bustling Old Town is the Charm-focused counterpart to the Factory District. Cobblers, bakers, and candlestick makers fill the cobblestone streets, and almost every shopkeeper carries a side case that can only be advanced through conversational checks. Teddy, the reformed pickpocket turned bartender, runs a speak-easy here that unlocks one of the game's most nuanced companion arcs.
賑やかなオールドタウンは、ファクトリー地区のCharm重視の対応版です。靴屋、パン屋、燭台職人が石畳の通りを埋め尽くし、ほぼすべての店主が会話チェックによってのみ進められるサイドケースを抱えています。前科者のスリからバーテンダーに転向したTeddyは、ここでスピークイージーを経営しており、ゲームで最もニュアンスに富んだコンパニオンアークの1つをアンロックします。
A-Tier placement is deserved because Old Town lacks the explosive loot of Pig Cage Walled City, but for any player running a Charm build, it is genuinely irreplaceable. For complementary rankings, see our NPC tier list where Kiki and Teddy receive individual scores.
Aティア配置は、オールドタウンがピッグケージウォールドシティの爆発的なルートを欠いているために相応しいですが、Charmビルドを運用するプレイヤーにとっては、本質的に置き換え不能です。補完的なランキングについては、KikiとTeddyが個別スコアを獲得しているNPCティアリストをご覧ください。
B-Tier Districts: Solid but Situational
B-Tier districts are not bad; they simply demand more setup before they pay off. They often gate their best rewards behind Spirit or Strength checks that low-level Lucas cannot pass.
Bティア地区は悪いわけではなく、利益を生む前により多くのセットアップを必要とするだけです。レベルの低いLucasが通過できないSpiritまたはStrength判定の背後にある最高の報酬をゲートすることがよくあります。
5. Neon Bazaar — The Merchant's Maze
The Neon Bazaar is the commercial heart of Dark Tide City and a frequent transit hub. However, our Kill The Shadow district tier list ranking places it in B-Tier because the most lucrative vendors do not appear until late Act II, making the early game feel sparse. Once unlocked, the Bazaar becomes the best place to convert Spirit shards into permanent stat boosts.
ネオンバザールはダークタイドシティの商業的中心地であり、頻繁な交通ハブです。ただし、Kill The Shadow ディストリクトティアリストランキングでは、最も儲かるベンダーが Act II 後半まで出現しないため、Bティアに配置されており、序盤は sparsely に感じられます。アンロックされると、バザールはスピリットシャードを永続的なステータスブーストに変換する最高の場所になります。
| District Stat | Neon Bazaar Rating |
|---|---|
| Case Density | ★★★☆☆ |
| NPC Richness | ★★★☆☆ |
| Loot Value | ★★★★☆ |
| Environmental Storytelling | ★★☆☆☆ |
| Build Synergy | Spirit secondary |
| 地区ステータス | ネオンバザール評価 |
|---|---|
| 事件密度 | ★★★☆☆ |
| NPC充実度 | ★★★☆☆ |
| ルート価値 | ★★★★☆ |
| 環境ストーリーテリング | ★★☆☆☆ |
| ビルドシナジー | Spirit副次 |
6. Drowned Cathedral Quarter — A Spirit Build Haven
Tucked beneath the cliffside mansions, the Drowned Cathedral Quarter is the spiritual sibling of Pig Cage Walled City. Flooded crypts and broken stained glass create an atmosphere that perfectly complements The Shadow's visions, but accessibility issues drag it down in the Kill The Shadow district tier list ranking. You will need at least two Spirit upgrades before most doors will open, which slows the early pacing considerably.
崖下の邸宅の下にもぐり込んだドラウンドキャセドラルクォーターは、ピッグケージウォールドシティの精神的な兄弟です。水浸しの地下墓地と割れたステンドグラスが、The Shadowのヴィジョンを完全に補完する雰囲気を作り出しますが、アクセシビリティの問題がKill The Shadow ディストリクトティアリストランキングでの評価を下げます。ほとんどのドアが開く前に少なくとも2つのSpiritアップグレードが必要であり、初期のペース配分を大幅に遅らせます。
For players who love puzzle-heavy exploration and are willing to invest in Spirit, however, the Cathedral Quarter hides some of the most moving lore entries in the entire game.
しかし、パズル重視の探索を愛し、Spiritへの投資を厭わないプレイヤーにとって、キャセドラルクォーターはゲーム全体で最も感動的な lore エントリの一部を隠しています。
C-Tier Districts: Proceed With Caution
These areas appear frequently on your map but contribute the least to a first playthrough. New players often wander here expecting main quest content and walk away with only minor crafting materials.
これらのエリアはマップに頻繁に表示されますが、最初のプレイスルーへの貢献度は最も低いです。新しいプレイヤーはメインクエストコンテンツを期待してここを歩き回りがちですが、わずかなクラフト素材だけを持って去っていくことがよくあります。
7. Industrial Outskirts — Transit-Only Territory
The Industrial Outskirts connect the Factory District to the highways that lead out of Dark Tide City. While the visual design is striking, with rusted smokestacks piercing an amber sky, the gameplay value is minimal. Our Kill The Shadow district tier list ranking places it in C-Tier because the only meaningful case here can be failed permanently if you do not trigger it within the first three visits.
インダストリアルアウトスカーツは、ファクトリー地区をダークタイドシティの外に伸びる高速道路に接続しています。錆びた煙突が琥珀色の空を突き抜けるビジュアルデザインは印象的ですが、ゲームプレイの価値は最小限です。Kill The Shadow ディストリクトティアリストランキングでは、ここでの唯一の有意義なケースが最初の3回の訪問以内にトリガーされないと永続的に失敗する可能性があるため、Cティアに配置されています。
| District Stat | Industrial Outskirts Rating |
|---|---|
| Case Density | ★★☆☆☆ |
| NPC Richness | ★☆☆☆☆ |
| Loot Value | ★★☆☆☆ |
| Environmental Storytelling | ★★★☆☆ |
| Build Synergy | None |
| 地区ステータス | インダストリアルアウトスカーツ評価 |
|---|---|
| 事件密度 | ★★☆☆☆ |
| NPC充実度 | ★☆☆☆☆ |
| ルート価値 | ★★☆☆☆ |
| 環境ストーリーテリング | ★★★☆☆ |
| ビルドシナジー | なし |
8. Ashfall Residential — Slow Burn, Soft Payoff
The Ashfall Residential zone is the home of minor recurring NPCs who offer fetch quests. It is a charming pixel-noir postcard, but in terms of mechanical depth, it barely moves the needle. You will likely complete it incidentally while traveling between S and A-Tier districts, which is exactly how the developers intend for it to be experienced.
アッシュフォールレジデンシャルゾーンは、フェッチクエストを提供するマイナーな recurring NPCの故郷です。それは魅力的なピクセルノワールの絵葉書ですが、メカニカルな深さという点では、針をほとんど動かしません。おそらく、SおよびAティア地区間の移動中に偶発的にそれを完了するでしょうが、それがまさに開発者が体験させたい方法です。
Tips for Maximizing District Value
Even with a great Kill The Shadow district tier list ranking in hand, you can squeeze more value out of every zone with a few optimization tricks.
優れたKill The Shadow ディストリクトティアリストランキングを手にしていても、いくつかの最適化トリックで各ゾーンからより多くの価値を引き出すことができます。
Use Time Rewind to Reset NPC Schedules
Many NPCs rotate between two or three districts based on the in-game clock. By activating time rewind at the right cathedral bell, you can cycle an informant like Kiki back into Pig Cage Walled City even after she has moved to the Neon Bazaar. This is essential for completionists chasing every dialogue branch.
多くのNPCは、ゲーム内の時計に基づいて2〜3の地区間をローテーションします。適切な大聖堂の鐘でタイムリワインドを起動することで、彼女がネオンバザールに移動した後でも、Kikiのような情報提供者をピッグケージウォールドシティに戻すことができます。これは、すべての会話ブランチを追うコンプリート主義者にとって不可欠です。
Match Your Build to the District You Enter
Before stepping into a new zone, glance at the Spirit, Strength, or Charm icon next to the district's loading screen door. These icons hint at which build will dominate the puzzles inside, and walking into a mismatched area can waste hours of trial-and-error.
新しいゾーンに入る前に、地区のロード画面ドアの横にあるSpirit、Strength、またはCharmアイコンを一瞥してください。これらのアイコンは、中のパズルを支配するビルドを示しており、ミスマッチなエリアに足を踏み入れると、何時間もの試行錯誤を無駄にする可能性があります。
Stack Corkboard Cases Before Traveling
Your corkboard can hold up to five active cases at once. Filling all five slots before visiting a district like Shipwreck Wharf ensures that every investigative action advances multiple threads simultaneously, dramatically reducing the total hours needed for full completion.
コルクボードには、一度に最大5つのアクティブケースを保持できます。シップレックワーフのような地区を訪問する前に5つすべてのスロットを埋めることで、すべての捜査アクションが複数のスレッドを同時に進行させ、完全クリアに必要な総時間を劇的に短縮します。
For broader strategic advice, our character tier list breaks down which build paths synergize best with which districts, and our dialogue option tier list shows which conversation choices consistently unlock the most rewards.
より広範な戦略的アドバイスについては、キャラクターチアリスト でどのビルドパスがどの地区と最も相乗効果を持つかを分析し、会話オプションティアリスト でどの会話の選択肢が最も多くの報酬を一貫してアンロックするかを示しています。
How the District Tier List Affects Endgame Content
Once the main quest concludes, the Kill The Shadow district tier list ranking shifts slightly. New Game Plus modes unlock exclusive bosses inside the Factory District and Pig Cage Walled City, while the Neon Bazaar gains black-market vendors stocked with cosmetic items. If you plan to chase the platinum trophy, revisit the S-Tier districts first because they hold the highest concentration of post-game secrets.
メインクエストが終了すると、Kill The Shadow ディストリクトティアリストランキングがわずかに変化します。ニューゲームプラスモードはファクトリー地区とピッグケージウォールドシティ内の限定ボスをアンロックし、ネオンバザールにはコスメティックアイテムで満たされたブラックマーケットのベンダーが追加されます。プラチナトロフィーを追うつもりなら、ポストゲームの秘密の最高濃度を抱えているため、最初にSティア地区を再訪してください。
For external context on the developer's design philosophy, the Shadowlight official site explains how each district is built to test a different investigative skill set, mirroring the Strength, Spirit, and Charm triad that defines Lucas's progression.
開発者のデザイン哲学に関する外部コンテキストについては、Shadowlight公式ウェブサイトが、各地区が異なる捜査スキルセットをテストするように構築されている方法を説明しており、Lucasの進行を定義するStrength、Spirit、Charmのトライアドを反映しています。
Final Verdict on the Kill The Shadow District Tier List Ranking
Dark Tide City is one of the most thoughtfully designed maps in any 2.5D detective RPG released in recent memory, and the districts of Kill The Shadow reward players who plan their routes carefully. By prioritizing Pig Cage Walled City and Shipwreck Wharf first, then branching into the Factory District and Old Town based on your build, you will hit the optimal balance of cases, loot, and lore. Remember that time rewind is your most powerful tool for reshaping the city around your needs, and your corkboard is the compass that ties every district together.
ダークタイドシティは最近の記憶に残る中で最も思慮深く設計された2.5D探偵RPGのマップの1つであり、Kill The Shadowの地区はルートを慎重に計画するプレイヤーに報酬を与えます。最初にピッグケージウォールドシティとシップレックワーフを優先し、次にそのビルドに基づいてファクトリー地区とオールドタウンに分岐することで、事件、ルート、 lore の最適なバランスを達成します。タイムリワインドがニーズに合わせて街を再構築するあなたの最も強力なツールであり、コルクボードがすべての地区を結びつけるコンパスであることを忘れないでください。
よくある質問
What is the best district in Kill The Shadow for beginners?
Kill The Shadowで初心者に最適な地区は何ですか?
The Pig Cage Walled City is the best starting district for beginners because it offers the gentlest difficulty curve, the highest NPC density, and direct tutorials for both corkboard deduction and time rewind mechanics that you will use throughout the entire game.
ピッグケージウォールドシティは、最も緩やかな難易度曲線、最も高いNPC密度、ゲーム全体で使用するコルクボード推論とタイムリワインドメカニクスの直接チュートリアルを提供するため、初心者に最適な出発地区です。
Which district should Strength builds prioritize in Kill The Shadow?
Kill The ShadowでStrengthビルドはどの地区を優先すべきですか?
Strength builds should prioritize the Factory District above all other zones because it contains the densest concentration of melee weapon schematics, upgrade materials, and brawler-friendly side cases that reward raw power over clever conversation.
Strengthビルドは他のすべてのゾーンよりもファクトリー地区を優先する必要があります。なぜなら、そこには近接武器の設計図、アップグレード素材、巧妙な会話よりも raw power に報酬を与えるブルーターフレンドリーなサイドケースの最も高密度の集中が含まれているからです。
Is Shipwreck Wharf worth visiting in every playthrough?
シップレックワーフはすべてのプレイスルーで訪れる価値がありますか?